0 items
in your cart
ITEMS:
TOOLS REQUIRED:
TIPS:
IMPORTANT:
DOUBLE BRACKET ASSEMBLY GUIDE CLICK HERE this link will open a PDF for Double Bracket assembly, this is done BEFORE you install them. The Left and Right brackets are identical so you must follow a few steps to make one bracket suitable for the chain side and one the non chain side.
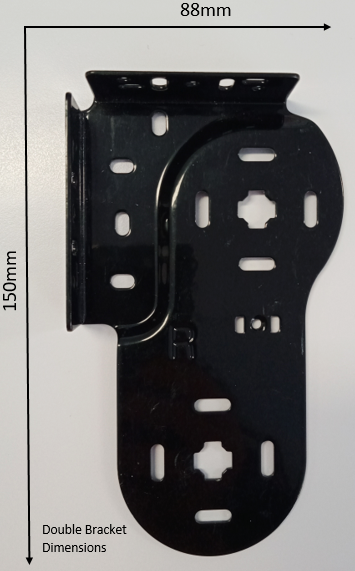 | Carefully remove outer plastic wrapper, then slowly peel tape off middle wrap. Release the brackets, screws and small clear stoppers from the plastic wrap. Set aside the stoppers they are vital to Step 3. Remove plastic and rubber band from chain. Examine your set of blinds to determine what side is the chain on. Please then ensure you have read the PDF above advising how to assemble the double brackets before installing them. Once they are assembled correctly, examine which one you have added the chain diverter to and which one you have added the idler bearing to. These correspond to the Roller Blinds end mechanisms. The chain diverter is for the chain side. The idler bearing circle cut out is for the non chain side. Be sure to place the correct bracket at the correct side of your window recess. Hold bracket in frames recess to determine your preferred placement. Note they are about 90mm deep, be mindful handles or mullions, making sure that your placement won't cause the blinds to hit anything when they are rolled down. Use a cordless drill to fix a bracket at each end with screws provided. Two screws per bracket is ideal. There are multiple possible screw points, you can decide which is best, e.g. screw through the side, top or back. |
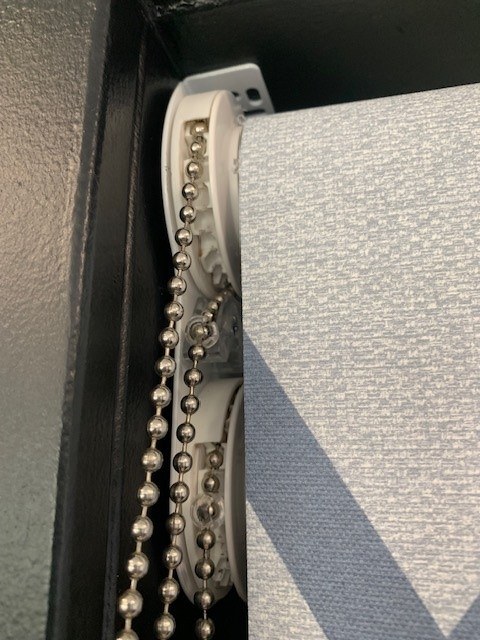 | Examine your blind end mechanisms, notice how the non chain end has a plastic pin. That pin mechanism has spring in it that can compress. The pin end lines up with the idler bearing circle cut out bracket. The chain end mechanism has a centre hook on it that slots into the cross bracket the same side as the chain diverter. The hook needs to point downwards into the lowest point of the cross shape on the bracket. The chain mechanism also has a half circle chain guard, this needs to be facing the top of the frame at an equal level. Install the lower blind first (Sunscreen or Light Filter) by inserting the non chain end (pin end) of the blind into the circle bracket. The pin end spring will compress enough to allow you place the chain end up and into the cross bracket. Push the hook into the cross bracket, locking the hook into place. This should feel very secure. Once securely in place, roll blind up and down to test it is rolling straight and even. If it's rolling on an angle contact us with a photo in an email and we will email you back a simple trick to help you even out your blinds rolling function. Repeat steps for the top blind, the Blockout. Ensure to loop the chain of the top blind through the chain diverter. |
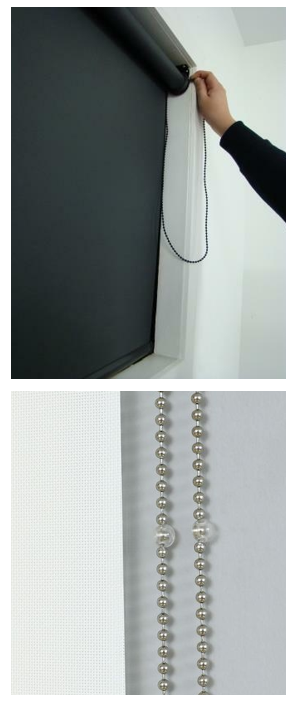 | The last step is crucial to correct installation of all Roller Blinds. Two clear plastic stoppers must be placed on the chain per blind to prevent the fabric rolling off the blind tube. If you fail to do this step there is a high possibility your blind fabric will completely separate from the tube. Placement depends on roll type, the below is based on back roll. The opposite (front of chain, back of chain) applies to front roll. Each blind is provided with two stoppers. Stoppers are difficult to remove so be sure to do the correct placement. First Stopper: Roll the blind down until it reaches the bottom of the window frame, (no more than the height you ordered). There is extra fabric on the roll but do not roll further than the bottom of the window frame. Place one stopper at the top of the chain at the front of the blind. This sets the lower limit. Second Stopper: Roll the blind up and place a stopper at the top of the chain at the back of the blind. This sets the top limit. TIP: Be careful to not pull chain too hard in either upward or downward direction otherwise your stoppers could ping off, putting the blind at risk of loosing its fabric. Always pull chain in a straight downward motion, never drag it across the fabric edge or you could pull chain out of drive unit and/or fray fabric. |
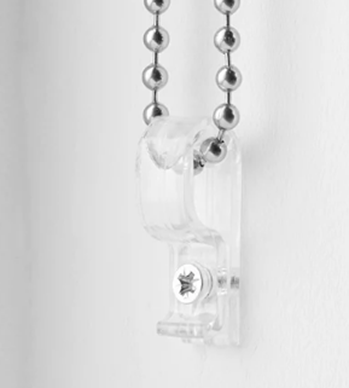
The Chain Safe is optional and only supplied if you ordered them. Designed to securely hold your chain in place against the window recess or wall. Chain safety devices are required by law in many countries as loose chains can pose a risk to young children. New Zealand does not currently have legislation for chain safety devices to be added to blind chains, but it is an easy to implement precautionary measure we offer to help keep your loved ones safe. Some people also just like the neat and tidy look.
To fasten the Chain Safe hook the bottom of the chain around the clip of the Chain Safe and position it either inside the recess or to the frame or wall (determined by whether the blind is fitted to the inside or outside of the window).
Make sure the position of the Chain Safe will not interfere with the blind once fully wound down. Allow for some slack in the chain so you may still operate the blind easily. Once you are satisfied with the position drill into place.