0 items
in your cart
ITEMS:
TIPS:
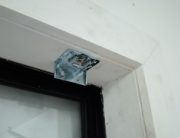 | Carefully unwrap your Honeycomb Blind. Using a pencil make a mark 70mm in from the top inside edge left, and top inside edge right about 5mm back from the front of the recess. Place the brackets in the middle of the pencil marks and screw into place. For blinds requiring more brackets space the remaining brackets evenly across frame width. The reason for this placement is so that the brackets are clear of the lifting mechanism. |
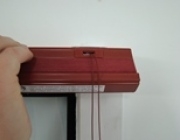
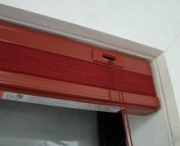 | When fitting the blind, leave the blind pulled up. On the front of the head rail at the top there is a lip. Hook this lip over the front of the bracket then push the back of the headrail up into the bracket until you hear it click into place. |
 | This is how it should look once completed. Pull the cords toward the middle of the blind, this releases the cord lock allowing you to lower the blind. |
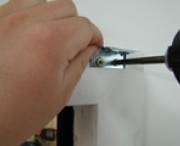 | Carefully unwrap your Honeycomb blind. For outside fit, using a pencil make a mark 85mm in from the top edge left, and top edge right. Place the brackets in the middle of the pencil marks and screw into place. For blinds requiring more brackets space the remaining brackets evenly across frame width. TIP: Pre-drill outside fit brackets (use 4mm drill bit) to avoid splitting frame. |
 | When fitting the blind, leave the blind pulled up. On the front of the head rail at the top there is a lip. Hook this lip over the front of the bracket then push the back of the head rail up into the bracket until you hear it click into place. |
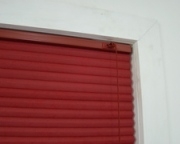
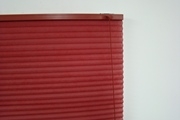 | This is how it should look once completed. Pull the cords toward the middle of the blind, this releases the cord lock allowing you to lower the blind. |